
Custom Retail Display Fabrication for Brands: 2026 Guide
Table of Contents
What Custom Retail Display Fabrication Actually Involves
From Rendering to Installed Fixture: The Real Sequence
Retail Environment Design: Why the Display Is Only Half the Decision
Materials and Engineering: Acrylic, Millwork, Metal, and Modular Systems
How Each Material Actually Behaves
Permanent vs. Semi-Permanent: Matching Material to Lifespan
Engineering Details That Decide Whether It Survives the Dock
Shop-in-Shop Fabrication: Building a Store Inside a Store
What Custom Retail Display Fabrication Costs (and What Drives the Number)
The Cost Drivers, in Order of Impact
A Budgeting Framework Buyers Can Actually Use
How to Compare Quotes That Look Nothing Alike
Measuring ROI: Turning Display Spend Into Numbers Your CFO Trusts
Digital, Interactive, and Sustainable: What Buyers Now Expect
How to Choose a Fabrication Partner (and What to Send Them)
Frequently Asked Questions
Last Updated: September 15, 2026
What Custom Retail Display Fabrication Actually Involves
Custom retail display fabrication is the process of designing, engineering, building, finishing, and installing a physical fixture or branded environment for a specific retail space. It starts with an objective and ends with a unit that survives freight, fits the floor plan, and holds up to daily shopper handling.
This guide from Breakthrough Productions covers what that process looks like, what drives the quote, and how to measure whether the spend paid off. Most buyers arrive with a rendering and one question: can this be built, shipped, and installed on schedule? This is often possible if fabrication gets involved before the design is locked.
From Rendering to Installed Fixture: The Real Sequence
Fabrication is not the last step. It runs alongside design from the start.
Discovery and constraints. Measure the space, photograph it, note ceiling height, floor load, power locations, and venue or landlord rules.
Concept and engineering review. A fabricator flags what cannot be built as drawn, and what can be built but will not survive shipping.
Prototyping and finish samples. Material and finish approvals happen before cutting, not after.
Fabrication. CNC cutting, millwork, acrylic forming, metal welding, and finishing.
Graphics and lighting integration. Backlit displays, signage integration, and AV get wired into the structure, not bolted on later.
Crating and freight. Custom crates are built to the fixture, not to a standard pallet size.
Installation and punch list. On-site assembly, leveling, and a walkthrough before the doors open.
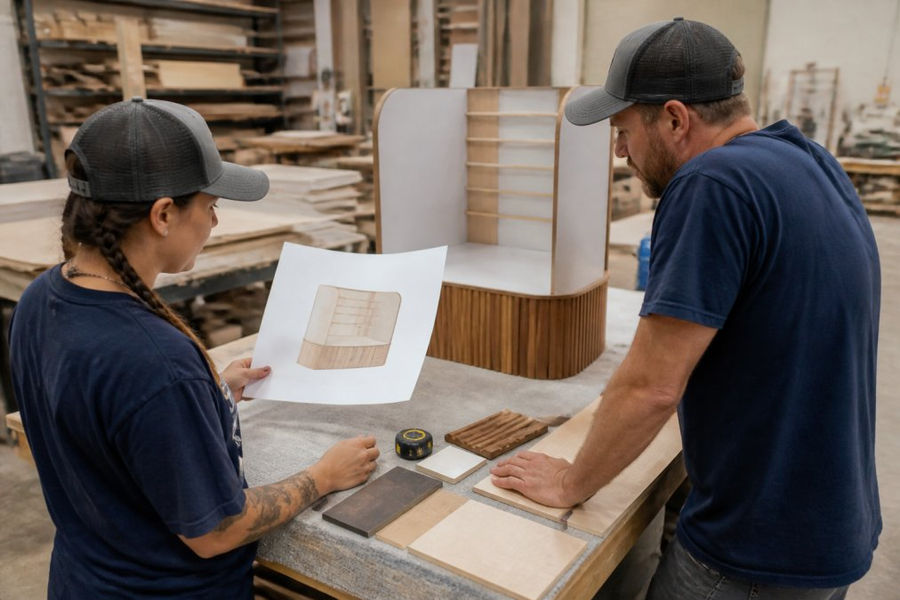
Pro Tip The cheapest place to fix a problem is on a screen. The most expensive place is on the show floor at 11 p.m. the night before opening. Engineering review can save significant time and cost on-site.
Retail Environment Design: Why the Display Is Only Half the Decision
Retail environment design arranges fixtures, sightlines, lighting, and traffic flow so the display actually gets seen.
If shoppers never pass your fixture, fabrication quality is irrelevant. Before approving a single detail, consider where shoppers enter, slow down, and naturally turn, then place the display there.
Sightlines: the fixture should be visible from the aisle, not just from directly in front of it.
Dwell zones: place higher-consideration displays where shoppers already pause.
Lighting: backlit displays and accent lighting pull attention in a dim retail environment.
Adjacency: put the display near the products it is meant to sell.
The customer journey is a physical path. Design for the path, not the object.
Materials and Engineering: Acrylic, Millwork, Metal, and Modular Systems
Material choice is a lifespan decision disguised as an aesthetic one. Each material brings different durability, weight, cost, and freight implications.
Material | Best For | Lifespan | Watch Out For |
Acrylic fabrication | Backlit displays, product visibility, clean edges | Semi-permanent | Scratches; needs careful crating |
Millwork | Premium fixtures, brand identity, warm finishes | Permanent | Heavy; freight and install labor add up |
Metal fabrication | Structure, frames, high-traffic fixtures | Permanent | Finish wear at contact points |
Modular displays | Multi-location rollouts, reuse | Reusable | Fewer bespoke shapes; design within the system |
How Each Material Actually Behaves
Acrylic is thermoformed, solvent-bonded, and polished at the edges. It reads as glass without the weight, which is why it dominates backlit product displays. The trade-off is scratch sensitivity: a display that ships loose arrives with hazed faces. The fix is a custom crate with foam-lined cradles and protective film.
Millwork is the language of premium fixtures: veneer, laminate, solid surface, and painted MDF over a plywood or steel core. It delivers warmth and brand fidelity no other material matches, and it is the heaviest option per square foot, so drayage, union labor minimums, and freight class all move against you. Design it in knock-down sections with cam locks or bolted flanges to cut install labor.
Metal carries the structure. Steel tube and angle frames, aluminum extrusion, and welded sub-assemblies let a fixture span a wide aisle without a visible leg. Powder coat can resist chipping better than wet paint at handles and shelf edges (Switching From Liquid Spray Coating To Powder Coating). Aluminum costs more per pound than steel but weighs roughly a third as much, which can sometimes offset costs in freight on a multi-city rollout (Standards).
Modular systems trade bespoke geometry for repeatability. Extruded aluminum frames, tension-fabric graphics, and standardized connectors let one design ship to twenty stores and assemble with hand tools. You may give up some bespoke geometry; you can gain a fixture a local crew may be able to install without the original build team.
Permanent vs. Semi-Permanent: Matching Material to Lifespan
A fixture designed to last five years should not be built with materials meant for a six-week pop-up. Over-building a temporary display can waste budget that could have gone into graphics, lighting, or a second location.
Ask one question before specifying anything: how long does this need to live, and how many times will it ship? That answer determines the material, the joinery, and the crate.
A few rules of thumb that hold up in practice:
One install, short life: foam-core, printed corrugated, and lightweight MDF with a laminate face. Cheap to build, cheap to discard.
One install, long life: millwork and metal, built to be leveled once and left alone.
Multiple installs: modular frames, knock-down millwork, and reusable crates. The extra engineering pays back on the second shipment.
High-touch, high-traffic: metal frames, powder coat, and replaceable graphic panels so a scuffed face is a swap, not a rebuild.
Engineering Details That Decide Whether It Survives the Dock
Most display failures are shipping and handling failures, not design failures. Three details separate a fixture that arrives clean from one that arrives in pieces:
Joinery. Cam locks, cross-dowels, and bolted flanges let a fixture break down into shippable sections. Glued-and-screwed assemblies are stronger but travel as one oversized piece and cost more to move.
Crating. Custom crates built to the fixture, not to a standard pallet size, with labeled sections and a documented packing order. A crate only the original crew can repack gets repacked wrong.
Service access. Power supplies, LED drivers, and AV components need a removable panel. If reaching a failed driver means disassembling the display, you have designed a maintenance problem into a marketing asset.
Watch Out Skipping the reuse plan can be a common budget mistake. A fixture built for one location often cannot be reconfigured for the next, which can mean paying for fabrication twice instead of paying for freight once.
Shop-in-Shop Fabrication: Building a Store Inside a Store
Shop-in-shop fabrication creates a defined branded environment inside a host retailer, using fixtures, flooring, lighting, and signage to establish a boundary that reads as its own space.
The host retailer sets the rules. Load-in windows, floor protection, electrical access, and fire-rated material requirements are non-negotiable and vary by chain and location. Building to the strictest host standard can help ensure the installation travels smoothly.
Three things decide whether a shop-in-shop works:
A clear visual boundary so shoppers register a distinct brand, not a shelf.
A footprint that fits multiple stores without redesigning for each one.
Installation that a local crew can complete without the original build team.
For national rollouts, modular displays and a documented install sequence matter more than any single fixture's design.
What Custom Retail Display Fabrication Costs (and What Drives the Number)
Custom retail display fabrication is priced per project, not per square foot, and the drivers are consistent across almost every quote. What most guides skip is the budgeting framework, how to build a number before you talk to a fabricator, and how to compare quotes that look nothing alike.
The Cost Drivers, in Order of Impact
Material and finish. A laminate-faced MDF fixture and a veneer-and-solid-surface fixture can share a footprint and differ substantially in build cost.
A Budgeting Framework Buyers Can Actually Use
How to Compare Quotes That Look Nothing Alike
Key Takeaway The number that matters is not just the fabrication cost. It is the cost per store, per year of use, including freight, install, and storage. A cheaper fixture that ships badly can cost more by the second install.
Measuring ROI: Turning Display Spend Into Numbers Your CFO Trusts
Metrics worth tracking:
Digital, Interactive, and Sustainable: What Buyers Now Expect
How to Choose a Fabrication Partner (and What to Send Them)
What to send for a quote:
Frequently Asked Questions
What is the typical lead time for custom retail display fabrication?
The schedule for custom retail display fabrication depends on design finalization, material lead times, finishing, and whether the program ships to one location or many. Timelines can be managed when drawings are locked early and the fabricator controls engineering, CNC, millwork, and finishing in-house rather than subcontracting each stage.
What materials hold up best for permanent versus semi-permanent retail displays?
Permanent fixtures usually call for solid wood or plywood millwork, welded metal frames, and laminated or powder-coated finishes that survive years of daily handling. Semi-permanent and pop-up displays lean on acrylic fabrication, aluminum extrusion, and modular displays that assemble fast and ship flat. The right choice depends on how long the display stays up, how often it moves, and how it gets cleaned.
How can custom retail displays improve brand engagement in a shop-in-shop environment?
A shop-in-shop works when the display reads as its own branded space inside the host store. That means lighting, signage integration, and product visibility planned together so shoppers recognize the brand from the aisle. Backlit displays, consistent fixture heights, and clear point-of-purchase zones guide the customer journey and hold attention longer. When the environment feels intentional, shoppers treat it as a destination rather than a shelf.
What information does a fabrication partner need to quote a custom retail display project?
Send whatever exists: a rendering, a rough concept, a budget, or simply the objective. Useful details include store or venue dimensions, quantity of units, target install date, material preferences, and any brand guidelines. If you have a budget number, share it. Working backward from the budget lets the fabricator recommend materials, engineering, and finishes that fit rather than guessing and revising later.
LET'S START SOMETHING AMAZING


Comments