
Materials That Make Retail Fixtures Easy to Assemble
Last Updated: November 18, 2026
Quick Summary
Plastic and aluminum assemblies go up fastest, making them the best materials for easy-to-assemble retail fixtures, while acrylic and glass demand the most care and wood sits in the middle. The connection system decides setup time more than the material itself, so specify tool-free cam locks or captive screws and count fasteners before approving a design.
Mixed-material systems move rigidity into an aluminum frame so panels attach at fewer points, lowering part count.
A modular unit with forty loose bolts takes longer to build than one with twelve captive connectors.
Level the base first, build the frame on the floor, then add shelves bottom to top before squaring and tightening.
Inspect connectors after every teardown for stripped threads, cracked plastic, and elongated holes.
Cheap cam locks and particleboard edges are the first things to fail after a few rebuild cycles.
Need fixtures that assemble fast on site?
We engineer and build retail fixtures designed for fast assembly, shipping, and reuse.
Table of Contents
Why Material Choice Decides How Fast a Fixture Goes Up
Most retail fixture problems start on a spec sheet, not on the floor. When teams compare materials for easy-to-assemble retail fixtures, they usually weigh looks and cost. They should weigh assembly time first. At Breakthrough Productions, we build retail environments and pop-ups for brands and agencies, and we've watched a beautiful fixture design stall on site because one material fought the install crew.
The material you pick controls four costs: labor hours on site, shipping weight, storage footprint, and how many times the fixture can be rebuilt before it fails. A fixture that takes two people an hour to assemble instead of twenty minutes doesn't just cost the extra forty minutes. It costs the second person, the crew's overtime, and the store opening that slips. Multiply that across a multi-site rollout and the gap grows fast.
This guide ranks retail display materials by assembly difficulty, shows where mixed materials pay off, and gives you the checks that prevent rework.
The Four Costs Material Choice Controls
Think of material selection as a cost decision, not an aesthetic one.
Labor: Heavy panels and loose hardware slow every install.
Freight: Dense materials raise shipping weight and handling.
Storage: Bulky fixtures eat warehouse space between uses.
Get these four right and the fixture works hard for years. Get them wrong and you rebuild it twice.
Retail Display Materials Ranked by Assembly Difficulty
Plastic and aluminum assemblies generally go up fastest, acrylic and glass demand the most care, and wood sits in the middle depending on how it's engineered. The ranking below runs easiest to hardest for a two-person crew working a store floor.
Material | Assembly Difficulty | Weight | Durability | Best For |
Plastic and aluminum | Easiest | Light | Good for light loads | Modular units, pop-ups |
Laminate over engineered board | Easy to moderate | Moderate | Good with edge protection | Shelving, tables, counters |
Solid wood and millwork | Moderate | Heavy | High | Permanent fixtures, shop-in-shops |
Acrylic | Moderate to hard | Light | Scratches easily | Display cases, signage |
Glass | Hardest | Heavy | Fragile in transit | Display cases, premium shelving |
How Wood, Metal, Plastic, and Acrylic Compare on Weight, Durability, and Setup
Wood is warm and brandable, and it can be shaped with CNC and millwork.
Metal, especially aluminum, gives you strength at low weight.
Plastic components are the easiest to assemble.
Acrylic looks clean and modern and is lighter than glass.
Glass delivers the premium look but is the hardest material to install.
A common mistake is choosing material per fixture instead of per program.
Modular Retail Displays: Where Mixed Materials Earn Their Keep
Modular retail displays combine materials on purpose: an aluminum frame for structure, laminate shelves for surfaces, acrylic for signage.

This is where mixed materials beat any single material. For deeper engineering guidance on multi-site programs, see how to engineer modular retail systems for multi-site rollouts.
The catch: mixed-material systems only stay easy to assemble if the connections are designed first.
The Connection System Is the Real Assembly Decision
Most buyers compare materials and skip the part that decides setup time: how the pieces join. The same aluminum frame can take twenty minutes or two hours to build depending on the connector.
Tool-free cam locks and twist connectors. Fastest for repeated installs. A quarter-turn seats the panel. The trade-off is holding power; they suit light-to-moderate shelf loads, not heavy structural spans.
Captive screw and bolt systems. One tool, usually a hex key, and hardware that stays attached to the panel so nothing gets lost in a crate. Slower than cam locks but far more forgiving of repeated teardown.
Slotted and channel extrusions. Panels slide into an aluminum channel and lock with a set screw. Excellent alignment and squareness, which cuts the squaring step later. Requires the panel edges to be machined to tolerance.
A practical rule: count the fasteners per fixture. A modular unit with forty loose bolts takes meaningfully longer to build than one with twelve captive connectors, and the gap widens across a multi-site rollout.
Why Mixed Materials Reduce Part Count
A single-material wood fixture often needs internal blocking, corner braces, and fasteners at every joint to stay rigid. That same frame-and-skin logic keeps small display pieces simple to position, while Utopia Toys and Models offers a useful next point of comparison for thinking about how risers support model displays.
That is the real argument for mixed materials on an easy-assembly fixture: not looks, but a lower part count and a shorter tool list.
Watch out: mixed-material systems fail at the interface, not the material. Where an acrylic panel meets an aluminum frame, or a laminate shelf meets a steel bracket, specify the fastener and any isolation washer up front.
Portable Retail Displays: Shipping, Storage, and Repeated Reconfiguration
Portable retail displays live or die by flat-pack design. Fixtures that break down into flat panels ship cheaper, store tighter, and reconfigure faster than bulky assembled units.
Breakthrough Productions
Weight is the hidden cost. If you're weighing standard pop-up options against something more durable, review alternatives to standard pop-up retail displays that hold up to repeated reconfiguration.
Watch out: cheap cam locks and particleboard edges are the first things to fail after a few rebuild cycles.
Retail Display Assembly: A Step-by-Step Sequence That Prevents Rework
Most assembly rework comes from sequence, not skill. Follow this order and the build stays clean.
Stage and sort. Lay out parts by assembly step, not by box.
Level the base first. Set feet and levelers before adding weight.
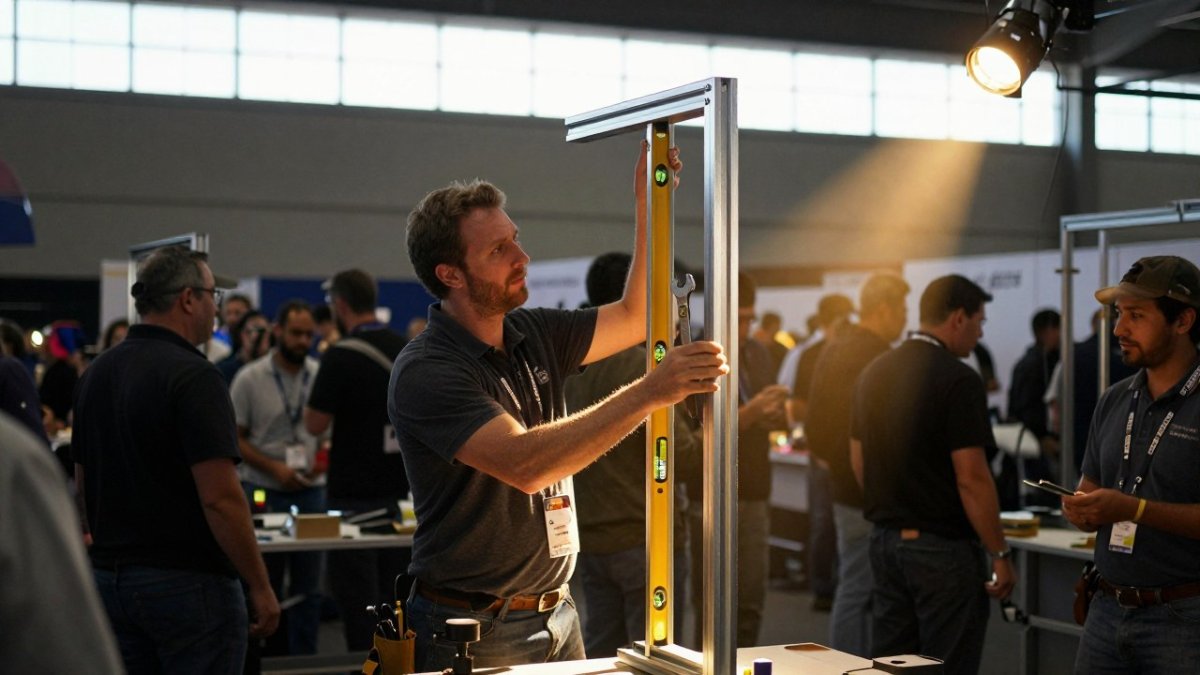
Build the frame. Assemble structural posts and connectors on the floor, then raise.
Add shelves and panels. Work bottom to top so you're not reaching over installed parts.
Square and tighten. Check diagonals, then torque all connections.
Install signage and lighting last. These are the most fragile and most often damaged.
Total time: plan for a two-person crew on a standard modular unit. Expected result: a square, stable fixture with no leftover hardware.
Stability, Load Ratings, and the Safety Checks Nobody Plans For
The safety checks that get skipped are the ones that cause incidents.
For durable builds, see our guide on choosing materials for durable trade show exhibits, which applies the same load and stability thinking to a related build type.
Watch out: a fixture that looks stable empty can fail once product goes on the shelves. Load it as designed before sign-off, not after opening.
How to Read a Load Rating
A load rating is only useful if you know what it assumes. Most fixture ratings are stated per shelf or per unit and assume the load is distributed evenly across the surface, not concentrated in one corner. A shelf rated for a given weight spread across its length can fail if that same weight sits in a single stack near one edge.
Ask three questions of any rating before you approve a design:
Per shelf or per unit? A unit rating that assumes even distribution across all shelves tells you little about a single overloaded shelf.
Static or dynamic? A static rating assumes the fixture sits still. A fixture that gets bumped, rolled, or leaned on in a busy store needs margin above the static number.
What is the deflection limit? A shelf can hold a load and still sag enough to look broken or drop product. Glass and acrylic deflect differently from laminate over the same span, which is why the same shelf design behaves differently by material.
Tipping, Anchoring, and the Tall-Fixture Problem
Height changes the math. A tall, narrow fixture with a light base is a tipping risk the moment a shopper leans on it or a cart clips a corner.
Anchoring rules vary by venue and by store, and pop-up and event spaces often restrict what you can drill into. Confirm the anchoring method before fabrication, not on install day, because a fixture designed to bolt to a floor it cannot be bolted to becomes a problem you solve with sandbags and hope.
The Inspection Cadence for Reusable Fixtures
A fixture that gets rebuilt across multiple sites needs a check between cycles, not just at first install. A simple pattern that catches most failures:
Inspect connectors after every teardown. Look for stripped threads, cracked plastic, and elongated holes. These are the first signs a joint is giving up.
Re-torque structural fasteners at each install. Repeated assembly loosens bolts even when nothing looks wrong.
Check edge banding and panel corners. Laminate and engineered board fail at exposed edges first, and a lifted edge is a snag and a moisture path.
Load-test before sign-off. Put the designed product weight on the shelves and confirm the fixture stays square and stable.
Track which fixtures fail and where. If the same joint fails on the third install across several units, that is a design fix for the next order, not a maintenance problem to keep patching.
Total Cost of Ownership: What Cheap Fixtures Cost Later
Cheap fixtures are a financing decision disguised as a savings decision. The low purchase price hides labor on every install, freight on extra weight, replacement parts, and the rollout delays from failed assemblies.
The material math is simple: buy for the number of installs, not the first one. If you're planning shop-in-shop or multi-site programs, the benefits of modular shop-in-shop displays cover reuse and long-term return in more detail.
Send Us Your Fixture Concept and We Will Engineer the Build
Here's the challenge: most fixture concepts are drawn for looks, then handed to whoever will build them cheapest. The assembly pain shows up later, on your floor, on your schedule.
Breakthrough Productions designs and fabricates retail fixtures, pop-ups, and shop-in-shop environments. We handle design, fabrication, logistics, and installation under one roof, so you get one partner from concept to loading dock.
Planning a retail build or rollout? Bring us your fixture concept and we'll engineer it for assembly, shipping, and reuse. Book a conversation about your fixture concept and let's work backward from what you're trying to accomplish.
Frequently Asked Questions
Which materials are best for easy-to-assemble retail fixtures?
Aluminum framing, plastic and acrylic panels, and prefinished plywood or MDF with cam-lock hardware assemble fastest because they are light, need few tools, and hold consistent tolerances. Solid hardwood and glass slow assembly down: they are heavy, require two people, and leave little room for error. The best retail fixtures usually combine materials, using a metal frame for structure and lighter panels for shelves and graphics, so the heavy work happens once and the rest clicks into place.
How do you choose materials for modular retail displays that get reconfigured often?
Pick materials that survive repeated handling, not just one install. Powder-coated steel or aluminum frames hold up to constant bolting and unbolting, while engineered wood panels chip at the edges after a few teardowns. Specify consistent hole patterns, captive hardware, and labeled parts so a crew can rebuild the same unit in a different layout without drilling new holes. Ask your fabricator how many assembly cycles each material can take before it needs replacing.
How do you make a retail display stable without making it difficult to assemble?
Stability comes from the base and the bracing, not from over-tightening every bolt. A wide, weighted base, cross-bracing on tall units, and leveling feet solve most wobble before assembly gets complicated. Keep the structural frame in one pre-built piece and let shelves and panels attach to it. Have your fabricator confirm load ratings for each shelf and check that tall fixtures can be tied off or anchored per the venue's requirements before install day.
What should you consider when choosing materials for a temporary retail display?
Weight, pack size, and setup time matter more than long-term wear for a temporary retail display. Foam-core or honeycomb panels, aluminum extrusion, and printed fabric graphics cut freight and let a small crew install in hours. Confirm the material can be crated for repeated shipping, that graphics can be replaced without rebuilding the fixture, and that storage between activations will not warp or scratch the finish.
Comments